The hydraulic brake system of your car or truck is a sealed system. That means whenever you unseal it or replace a part, you will have to bleed all the air out of it. Air is a fluid, and obviously, brake fluid is a fluid, and they cannot occupy the same space at the same time. However, the air can be compressed, which is what it will do instead of applying the brakes if you don't remove it.
These instructions apply to most street cars and race cars with a tandem master cylinder. Race cars with two separate master cylinders on a balance bar are different and require bleeding two wheels at a time, one front and one rear (purge bleeding instructional video).
Bench Bleeding the Master Cylinder
The easiest part of bleeding the brake system is bench bleeding the master cylinder, though it requires taking it out of the car. If you are installing a new master cylinder, Wilwood or OEM style, it is already out! But test fit it to the firewall/booster first and make sure everything is right, including the pushrod length, before putting fluid in it. It is a lot less messy that way.
It is crucial you bench bleed the master cylinder because, as mounted to the car, it is impossible to get all the air out of the piston bore. You will never have an appropriately firm pedal as long as there are still air bubbles that need to be compressed in front of the piston, and there is little chance they will find their way out on their own. The only escape the bubbles have is back into the fluid reservoir through a tiny hole at the back of the bore, and most cars mount the master cylinder flat or at a slight upward angle, trapping air at the far end of the bore.
Bench bleeding is easy, but you will need a bench-mounted vice to hold the master cylinder.
- Clamp the master cylinder in a way that won't damage it, typically by the mounting flange.
- Try to get it level, or even with the front pointed down slightly, so air bubbles can escape through the compensating port or brake outputs.
- Thread plastic fittings into the output ports, and route the hoses back to the reservoir.
- Pump the piston with a dowel, screwdriver, or the attached pushrod slowly through its entire stroke several times, then several short, fast strokes.
- Continue alternating until you no longer see bubbles in the hoses.
Now you are all set to reinstall the master cylinder in the car and connect it to the brake lines. Careful not to drip any brake fluid on painted surfaces.
Bleeding the Brake System

After connecting the brake lines to the master cylinder, proportioning valve, and all four calipers, it is time to bleed the whole system to fill the calipers with fluid and purge any air in the lines. This is the same process you would use to flush the system of old fluid and fill with higher performance Wilwood High Temp 570 or EXP 600 PLUS brake fluid. Most people neglect this maintenance on daily drivers, but even on commuter cars it is essential to flush it every other year and every year on any car driven hard. Many racers flush out the old fluid after every race weekend, if not every race!
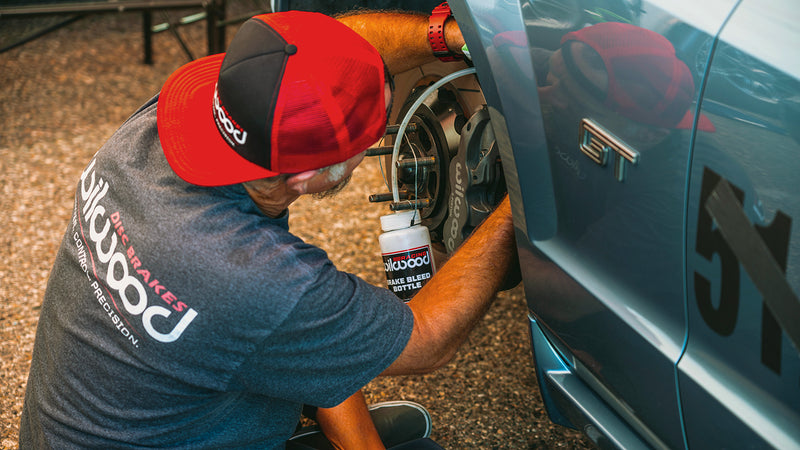
The most critical aspect of bleeding brakes is not to let any air back into the system. You will need an assistant to pump the brakes on command, or you can employ one of the many one-person brake bleeding techniques, like the Wilwood Brake Bleeding Bottle. With an assistant, you have them pump the brakes and hold the pedal, then you loosen the bleed screw to let out the air bubbles and fluid. With a bleed bottle, the bleed screw nipple is attached to a hose submerged in brake fluid, and you pump the pedal yourself with the screw open; the fluid keeps air from being sucked back into the caliper. Then repeat over and over until there are no bubbles.
You can also bleed the brakes with a vacuum pump or syringe. With a vacuum pump, you suck the fluid through the system via each bleed nipple, displacing the air. With the syringe, you inject fluid into the caliper through the bleed screw, and it pushes any air bubbles back into the reservoir. Follow the directions that come with these tools for a more detailed explanation.
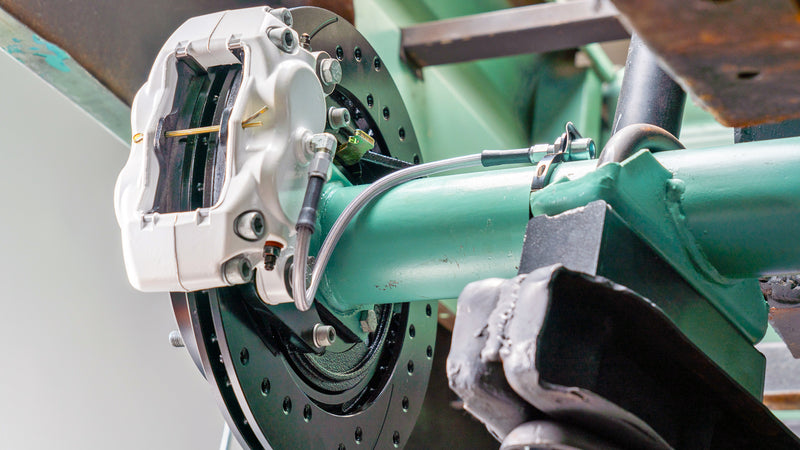
Note: Most Wilwood calipers have two bleed nipples and some have four. Never bleed the lower screws that point downward. They are only there so that the caliper can be used on either side of the car.

- Start with the wheel farthest from the master cylinder, usually the right rear for left-hand drive cars.
- Put a hose on the outside upper bleed nipple connected to the bleed bottle or a catch can.
- Have your assistant pump the brake pedal, then hold it, loosen the bleed screw and let out the air and fluid, then close it.
- If you have no assistant, make sure the hose's end is submerged in the bleed bottle, loosen the screw, then pump the brake pedal.
- Repeat until only fluid shows in the hose with no air bubbles, then tighten the outside bleed nipple and attach the hose to the inner nipple.
- Repeat the procedure on the inner nipple.
- Check the fluid level in the master cylinder as you work. If you pump all of the fluid out of the reservoir, you will have to start all over again.
- Repeat the process with each wheel, moving successively toward the master cylinder. Right rear, left rear, right front, and finally left front.
- Refill the master cylinder reservoir and replace the cap.
Once you have a nice firm pedal, replace the wheels and tighten the lug nuts to their proper torque values. Now is also an excellent time to check for fluid leaks at the calipers and brake line fittings.
Similar Articles
Mazda MX-5 Miata Brake Kit Buyers Guide

When the Mazda MX-5 Miata was introduced in the early 1990s, conventional wisdom was that nobody wanted a small two-seat convertible sports car. The British sports cars that had defined... Read More
The Wilwood Shop Truck F100 - From Pack Mule to Show Horse

After Wilwood’s Workhorse Mustang was on the road, our R&D guys started itching to start a new project. A clean, rust-free, but otherwise unremarkable 1974 Ford F100 short-bed pickup truck... Read More
Wilwood Rear Flexline Kits with Clamp or Weld On Axle Mount
Cars and trucks originally built with rear drum brakes (and even some factory disc brakes) on a solid axle typically have a rubber flexline in the center of the car... Read More
Hello, I have bench bleed M/C and used vacuum bleeder on all 4 calipers and still have no pedal. We have done this two times and still no brake pedal. It barely comes out the bleeder valves at the calipers. 66 mustang all new system w/4wheel discs, proportional valve, tandem M/C with power brakes. What have we missed? Thanks